This page explains the geometry of the tile for building a sphere.
There are 30 rhombic elements in the triacontahedron.
In order for the tiles to hold together with no glue or fasteners,
each of the 4 corners have a hook.
There are two different shapes: Celtic and Rhombus.
Each of these tiles have front and back which are shown in different colors below.
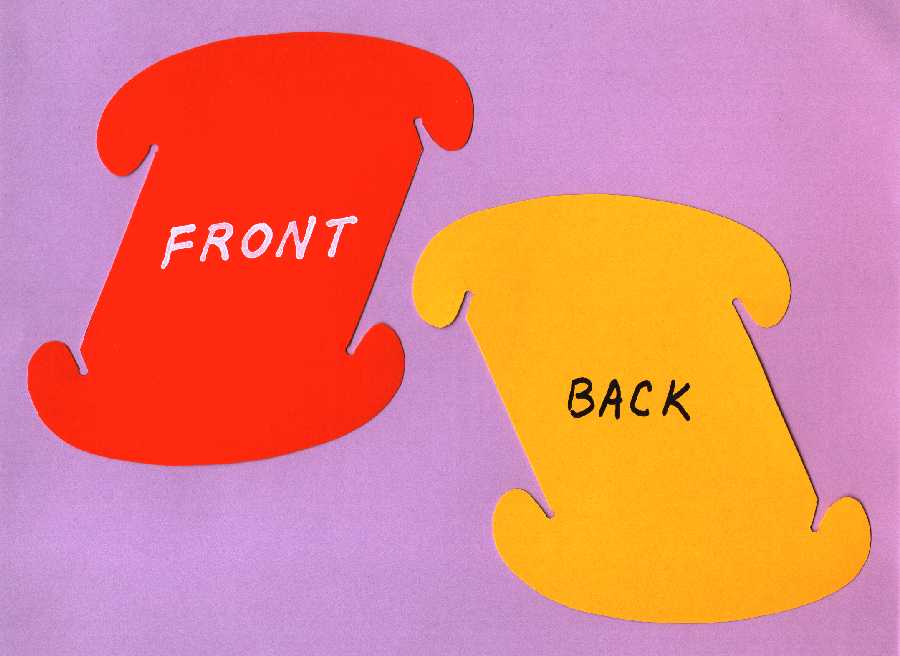
The Celtic tile is name because of the curve edges similar to Celtic spirals.
This tile was invented in 1973 by Danish designer
Holger Strom.
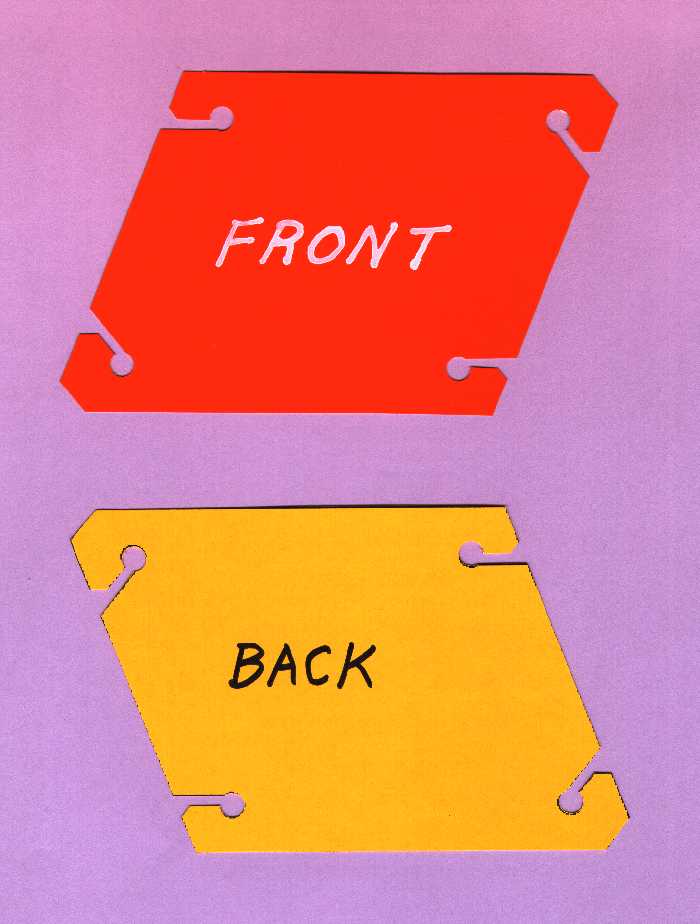
This is the straight edged version: Rhombus tile.
The straight edges are easier to cut and use up less material.
All tiles in an assembly should be one color and one shape.
In the above example it is easy to distinguish front and back because the color
is different on the two faces of the tile. Some plastic tiles have the same
color on both sides. For a lamp, the tiles are translucent to diffuse light.
It is important to not mix front with back.
The following picture shows 8 important features of the tiles.
Knowing these features will help to assemble the sphere.
The Celtic tile and the Rhombic tile have the same features.
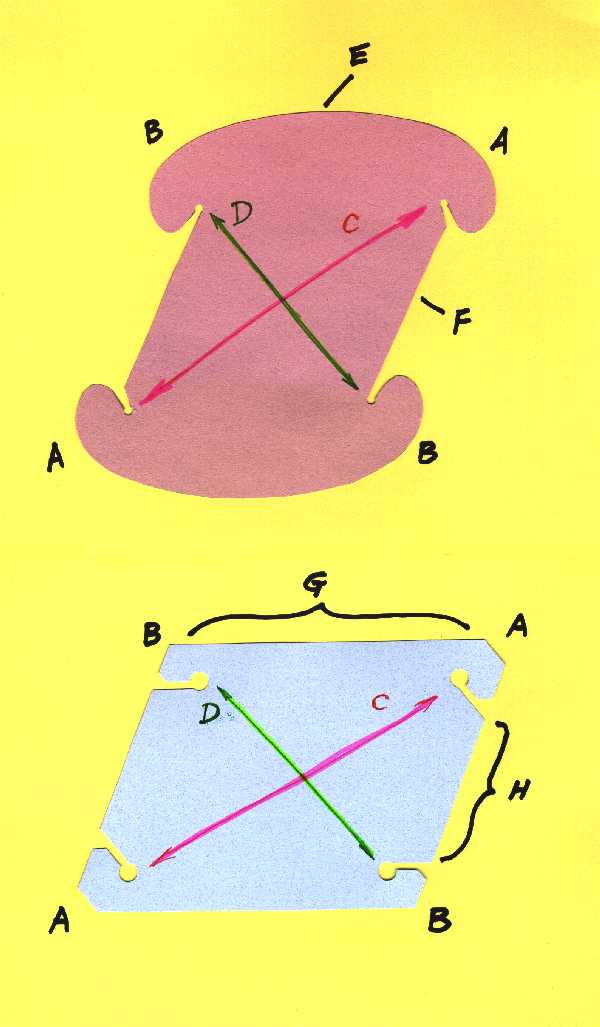
Each tile has 4 corners.
"A corners" are sharp corners(acute). The inclusion angle is about 60 degrees.
Because of this sharp angle, 4 or 5 corners can fit into a vertex.
"B corners" are fat corners(obtuse). The inclusion angle is about 120 degrees.
Because of this fat angle, no more than 3 corners can fit into a vertex.
In the triacontahedron, "A corners" fit in vertices of 5 tiles.
"B corners" fit in vertices of 3 tiles.
"A corners" and "B corner" are not mixed together at any vertex.
The long diagonal is marked "C". This diagonal connects the two "A corners".
The short diagonal is marked "D". This diagonal connects the two "B corners".
The Celtic tile has two curve sides "E". These two sides are extra long.
In the assembly process, these sides are compressed to make the curve more severe.
The two straight sides of the Celtic tile are marked "F". These sides are put
in tension during the assembly process.
The long sides of the Rhombic tile is marked "G". These sides are compressed
during assembly so that they become curves.
The short sides of the Rhombic tile is marked "H". These sides are put in
tension during the assembly process.
TIPS FOR ASSEMBLY:
(1) Use only "FRONT" or only "BACK" within an assembly. Do not mix FRONT with BACK.
(2) All sharp corners fit with other sharp corners. There are 12 of these 5X vertices.
(3) All fat corners fit with other fat corners. There are 20 of these 3X vertices.
(4) All tension edges fit with compression edges.
(5) The compression edge is placed on the top (outside) of the tension edge.
This allows the compression edge to form a hump over the tension edge.
(6) Start the assembly from the North Pole cap or the South Pole cap.
Both of these have 5X assembly of the sharp corners.
Step-by-step instruction to build the sphere
Instructions to build rhombic dodecahedron
Rhombic
polyhedron kit
Order the kit with email
Last update:7/30/2004 Copyright 2004 by William Chow